
How To Make More Money With a Blog (Pt. 1)
Subscribe to my newsletter for subsequent posts on this topic.
In this post you will learn how easy it is to start your own blog without a lot of money using WordPress, Godaddy and cPanel. Blogging is a great way to get your ideas in front of people. Your blog is a way to advertise yourself and create credibility with people who do not know you. Prospective clients can read your posts, become familiar with your process and join your email list. Through your blog and email list you can create calls to action to get more clients and customers. You can also monetize your blog. This post focuses on creating the blog. In future posts I’ll write about how to promote and monetize. Join the TWPW Community and be first to receive emails of future posts.
There will be four parts to your blog; your domain or web address, a content management system (CMS), a core hosting interface like cPanel and a server to hold all your data. For a blog I strongly recommend WordPress as your CMS and Godaddy as your host which includes cPanel. Where you register your domain is irrelevant. Domains.com, Blue Host, HostGator or GoDaddy will work fine. You can even register with one registrar and transfer to another. In this post I will focus on what you need to do to develop a blog with WordPress, GoDaddy and cPanel including missteps to avoid. In the spirit of full disclosure, I do have a business relationship with Godaddy and HostGator and will receive a commission through the links in this post. The more you read my posts, though, you’ll learn that I do not recommend a company simply because of a business relationship. Actually, it’s the other way around, I have business relationships with companies that I am comfortable recommending on their own merit. I’ve used GoDaddy for almost all of my websites and my clients’ websites since 2008. I thank you in advance for doing business with these companies via links here.
The first step is to select a good domain name, that’s your website address. There are two parts to every website; the address and the content. The content resides on a server with the company you select as your host provider. For example, if you select Godaddy your information will be on a server around the Phoenix area, most likely Tempe. This will change when Godaddy fully integrates with AWS (Amazon Web Services). But that won’t matter with whom you register your domain. The network of ISPs, routers and switches will find your content when anyone types in your website address.
Here’s a few tips in creating a domain name:
- The shorter the better.
- But not too short. Your domain name can help people identify what your blog is about.
- Don’t use hyphens or intentional misspells.
- Select the appropriate TLD. That’s the ending part of your domain like .com .net or .org. You should decide if you really plan to develop a network or an organization like a non-profit before you buy a .net or .org.
- Only approved educational institutions can use .edu. Even if your objective is to educate this TLD may be difficult to obtain.
The next step is to select a hosting plan. Don’t mistakenly buy a cookie cutter website builder plan from Wix, Weebly or even Godaddy because it sounds simple to build. They are simple but will not have the flexibility you need and will result in wasted money and wasted effort. Get a hosting plan.
When setting up your hosting plan, you will enter your domain name as the primary domain. My hosting is already set up so I don’t have an image for you but there should initially be a blue button that says “Setup”. Start there.
Below I use screen shots from my GoDaddy account as examples of what to do next. After you set up your hosting plan, click on the Manage button.

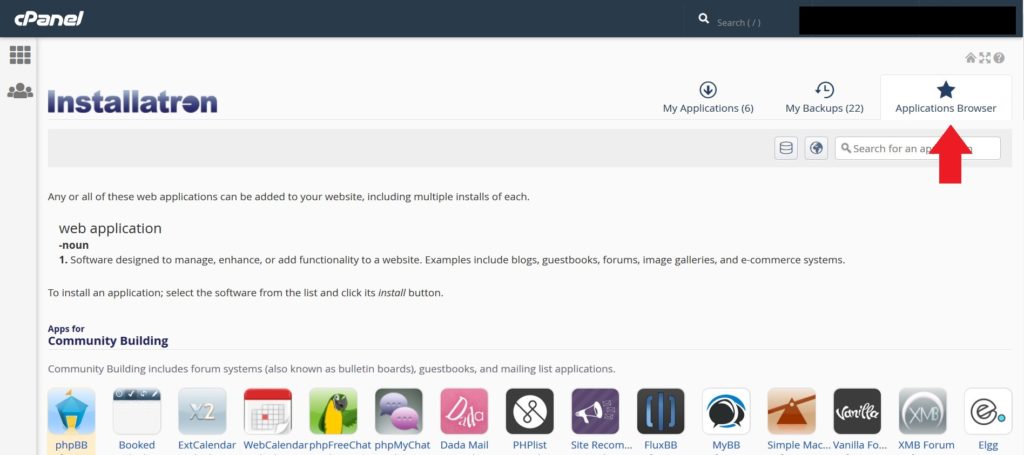
This takes you to your control panel. Click on Installatron, this is an aid to help you install a CMS to your cPanel host.
*

Across the top you’ll see a tab labeled Applications. Click that.
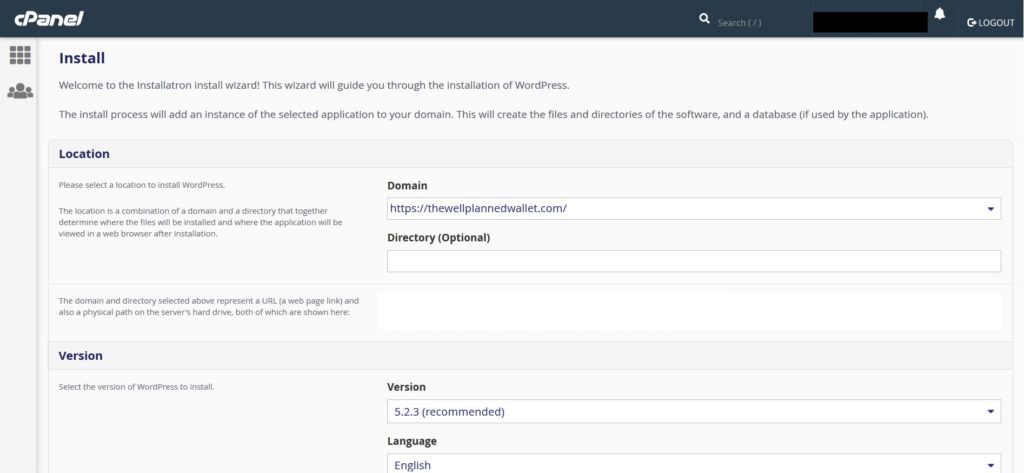
Click on WordPress to have it installed. This will take a few minutes.

Next, you’ll set up the basics of your WordPress by completing the following. Leave Directory (Optional) blank. It may read “Blog”. Erase that.
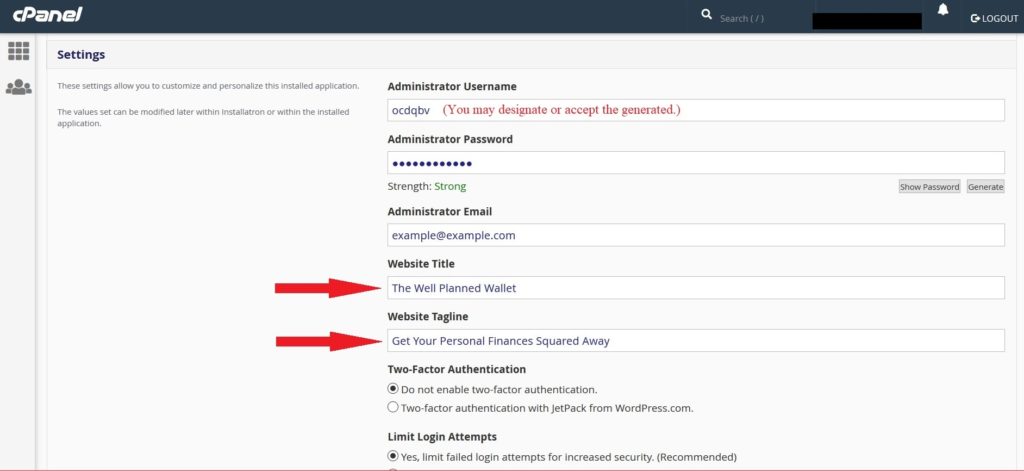
You can change Admin and Password. I usually change admin to something personalized to the site and accept the generated password. Copy both to a notepad and drop it into a file related to blog. You should set up a file folder to keep all your notes related to your site. Complete Website Title and Website Tagline. These will appear in the header of your site.
Then click Install
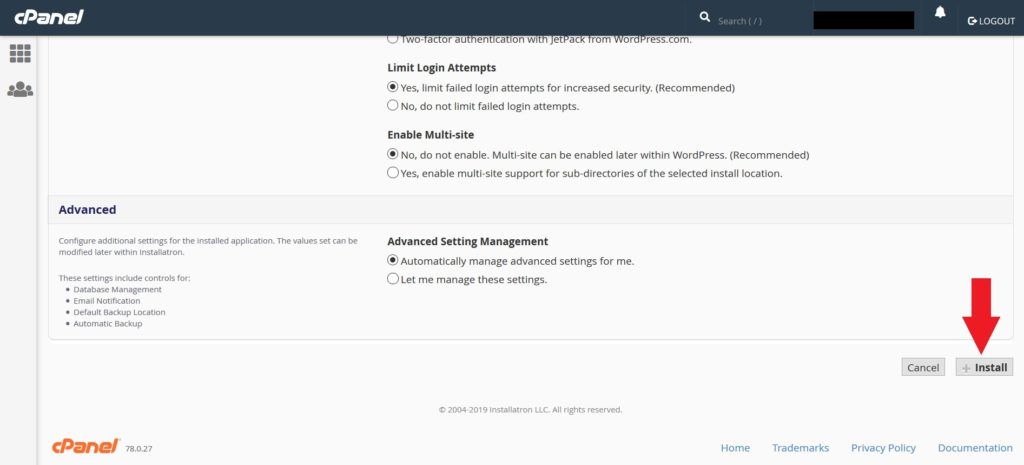
Next, you can choose Setup Wizard or go it alone. Choose Setup Wizard.
When Setup Wizard asks you to pick a theme you can pick anything, it doesn’t matter, you’ll change it later anyway.
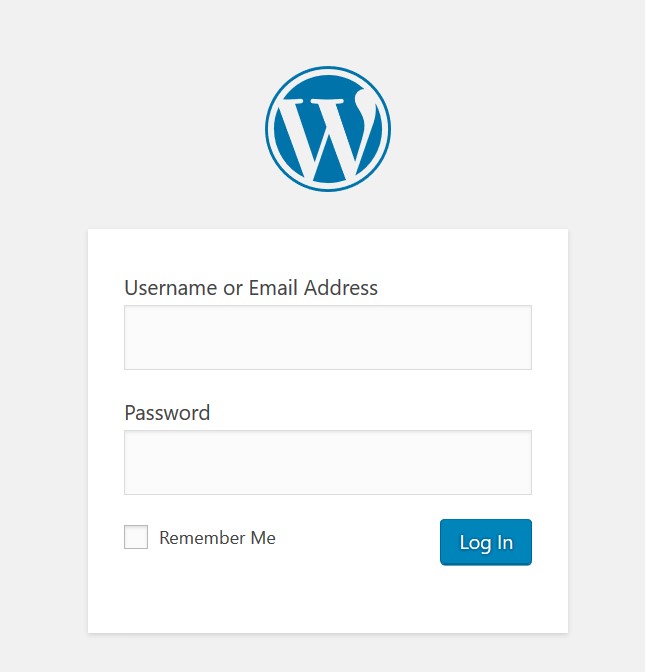
There are different paths to access your WordPress control panel. One is to type your domain in the address bar followed by /wp-admin (https://example.com/wp-admin) You will see the following sign in page where you put the credentials that you just saved
This is your Dashboard.

There are two ways to change the theme. In this post I’ll cover the quickest way. It may not always bring about the best results depending which theme you choose. But it will get you started. In my blog course I go more into detail about both methods.
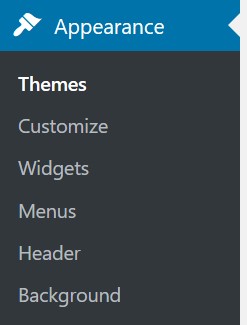
First, investigate wordpress.org for themes. I use ColorMag by ThemeGrill for The Well Planned Wallet. When you find what you like go back to your website account and navigate to Dashboard>Appearance>Themes. At the top select Add New then type in the theme you’ve chosen in the search bar. Select Install then Activate.

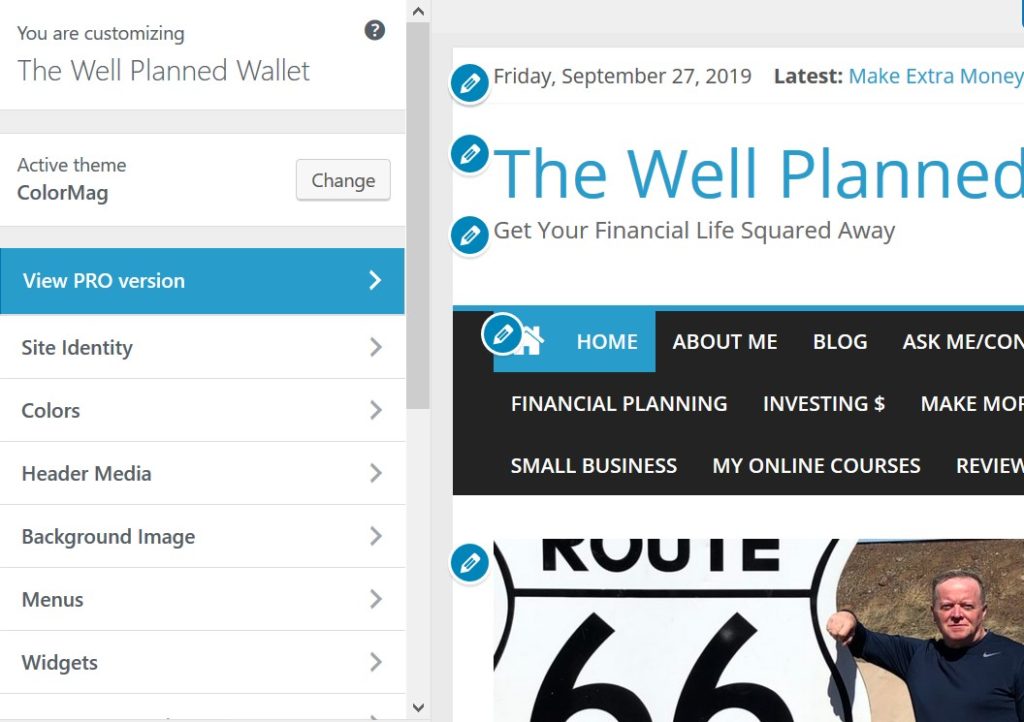
Your first thought should be that it doesn’t look anything the example on WordPress’s website and the developer’s website. Your next steps are to install the plugins needed and the demo packet. Your theme will have those instructions. After that is completed navigate to Dashboard>Appearance>Customize. A menu should open on the left with customize options.
Now you are on your way to creating your blog. What you’ve read here is just the tip of the iceberg. I will have follow-up posts to take you to the next steps later and soon, an online course in great detail of how to create, promote and monetize your blog. Join The Well Planned Wallet community by adding your email to the list and you’ll be notified when new content is available as well when the online course is published.
***


A powerful share, I just given this onto a colleague who was doing a bit of evaluation on this. And he in reality purchased me breakfast as a result of I found it for him.. smile. So let me reword that: Thnx for the treat! However yeah Thnkx for spending the time to debate this, I feel strongly about it and love reading more on this topic. If possible, as you turn into expertise, would you mind updating your blog with more details? It’s highly useful for me. Large thumb up for this blog publish!
Thanks